A proper bike fit is the foundation of comfortable, efficient, and injury-free cycling. Whether you're a casual rider or competitive cyclist, achieving the right fit can transform your riding experience, improve performance, and prevent common cycling-related injuries. This comprehensive guide will help you understand and achieve the perfect bike fit.
Why Bike Fit Matters
A proper bike fit affects every aspect of your cycling experience:
Benefits of Proper Fit
- • Increased comfort and reduced fatigue
- • Improved power transfer and efficiency
- • Reduced risk of injury
- • Better bike handling and control
- • Enhanced enjoyment of cycling
Signs of Poor Fit
- • Knee, back, or neck pain
- • Numbness in hands or feet
- • Difficulty reaching handlebars
- • Feeling stretched out or cramped
- • Saddle discomfort
Key Measurements and Adjustments
Achieving proper bike fit involves several key measurements and adjustments:
Saddle Height
The 109% Method
Measure your inseam in centimeters and multiply by 0.883. This gives you the distance from the center of the bottom bracket to the top of the saddle.
Alternative Methods
- Heel method: Sit on the bike with your heel on the pedal at the bottom of the stroke. Your leg should be fully extended.
- 25-30 degree method: At the bottom of the pedal stroke, your knee should have a 25-30 degree bend.
- Hip rocking test: If your hips rock side to side while pedaling, the saddle is too high.
Saddle Position (Fore/Aft)
Proper saddle position affects knee tracking and power transfer:
- Sit on the bike with pedals horizontal (3 and 9 o'clock positions)
- Drop a plumb line from the front of your forward knee
- The line should pass through the pedal axle or slightly behind it
- Adjust saddle forward or backward as needed
Handlebar Height and Reach
Handlebar Height
For comfort riding, handlebars should be level with or slightly higher than the saddle. For performance riding, they can be 2-4 inches lower.
Reach
When riding in the drops, your torso should be at a 45-degree angle to the ground. You should be able to see the front hub behind the handlebars.
Step-by-Step Fitting Process
Follow this systematic approach to achieve proper bike fit:
Step 1: Frame Size Selection
Frame Size Guidelines
Stand over the bike with both feet flat on the ground. There should be 1-2 inches of clearance for road bikes and 2-4 inches for mountain bikes.
Remember: It's better to size down and adjust up than to have a frame that's too large.
Step 2: Saddle Adjustment
- Set saddle height using your preferred method
- Adjust fore/aft position for proper knee alignment
- Level the saddle or tilt nose down 1-2 degrees if needed
- Test ride and make fine adjustments
Step 3: Handlebar Setup
- Adjust stem height for comfort and aerodynamics
- Set handlebar width to match shoulder width
- Position brake levers for easy reach
- Adjust hood angle for comfortable hand position
Step 4: Cleat Position (if applicable)
Fore/Aft Position
Position cleats so the ball of your foot is over the pedal axle. This provides optimal power transfer and comfort.
Angle Adjustment
Set cleats to match your natural foot angle. Most riders need 0-6 degrees of outward angle (toe out).
Common Fit Issues and Solutions
Address these common problems with targeted adjustments:
Knee Pain
Front of Knee Pain
Usually caused by saddle too low or too far forward. Raise saddle height and/or move saddle back.
Back of Knee Pain
Often indicates saddle too high. Lower saddle in small increments until pain subsides.
Side of Knee Pain
May be caused by cleat position or saddle height. Check cleat angle and consider professional fitting.
Back and Neck Pain
- Lower back pain: Raise handlebars, shorten reach, or improve core strength
- Upper back tension: Check handlebar width and brake lever position
- Neck strain: Raise handlebars or use a shorter stem
Hand and Wrist Issues
- Numbness: Adjust brake lever angle, use padded gloves, or change hand positions frequently
- Wrist pain: Check handlebar height and consider ergonomic grips
- Pressure points: Ensure proper weight distribution between saddle and handlebars
Different Riding Styles, Different Fits
Bike fit varies depending on your riding style and goals:
Comfort/Recreational
- • More upright position
- • Handlebars level with saddle
- • Wider, more comfortable saddle
- • Emphasis on comfort over aerodynamics
Endurance/Touring
- • Moderate riding position
- • Balance of comfort and efficiency
- • Multiple hand positions
- • Stable, predictable handling
Performance/Racing
- • Aggressive, aerodynamic position
- • Lower handlebars
- • Longer reach
- • Maximum power transfer
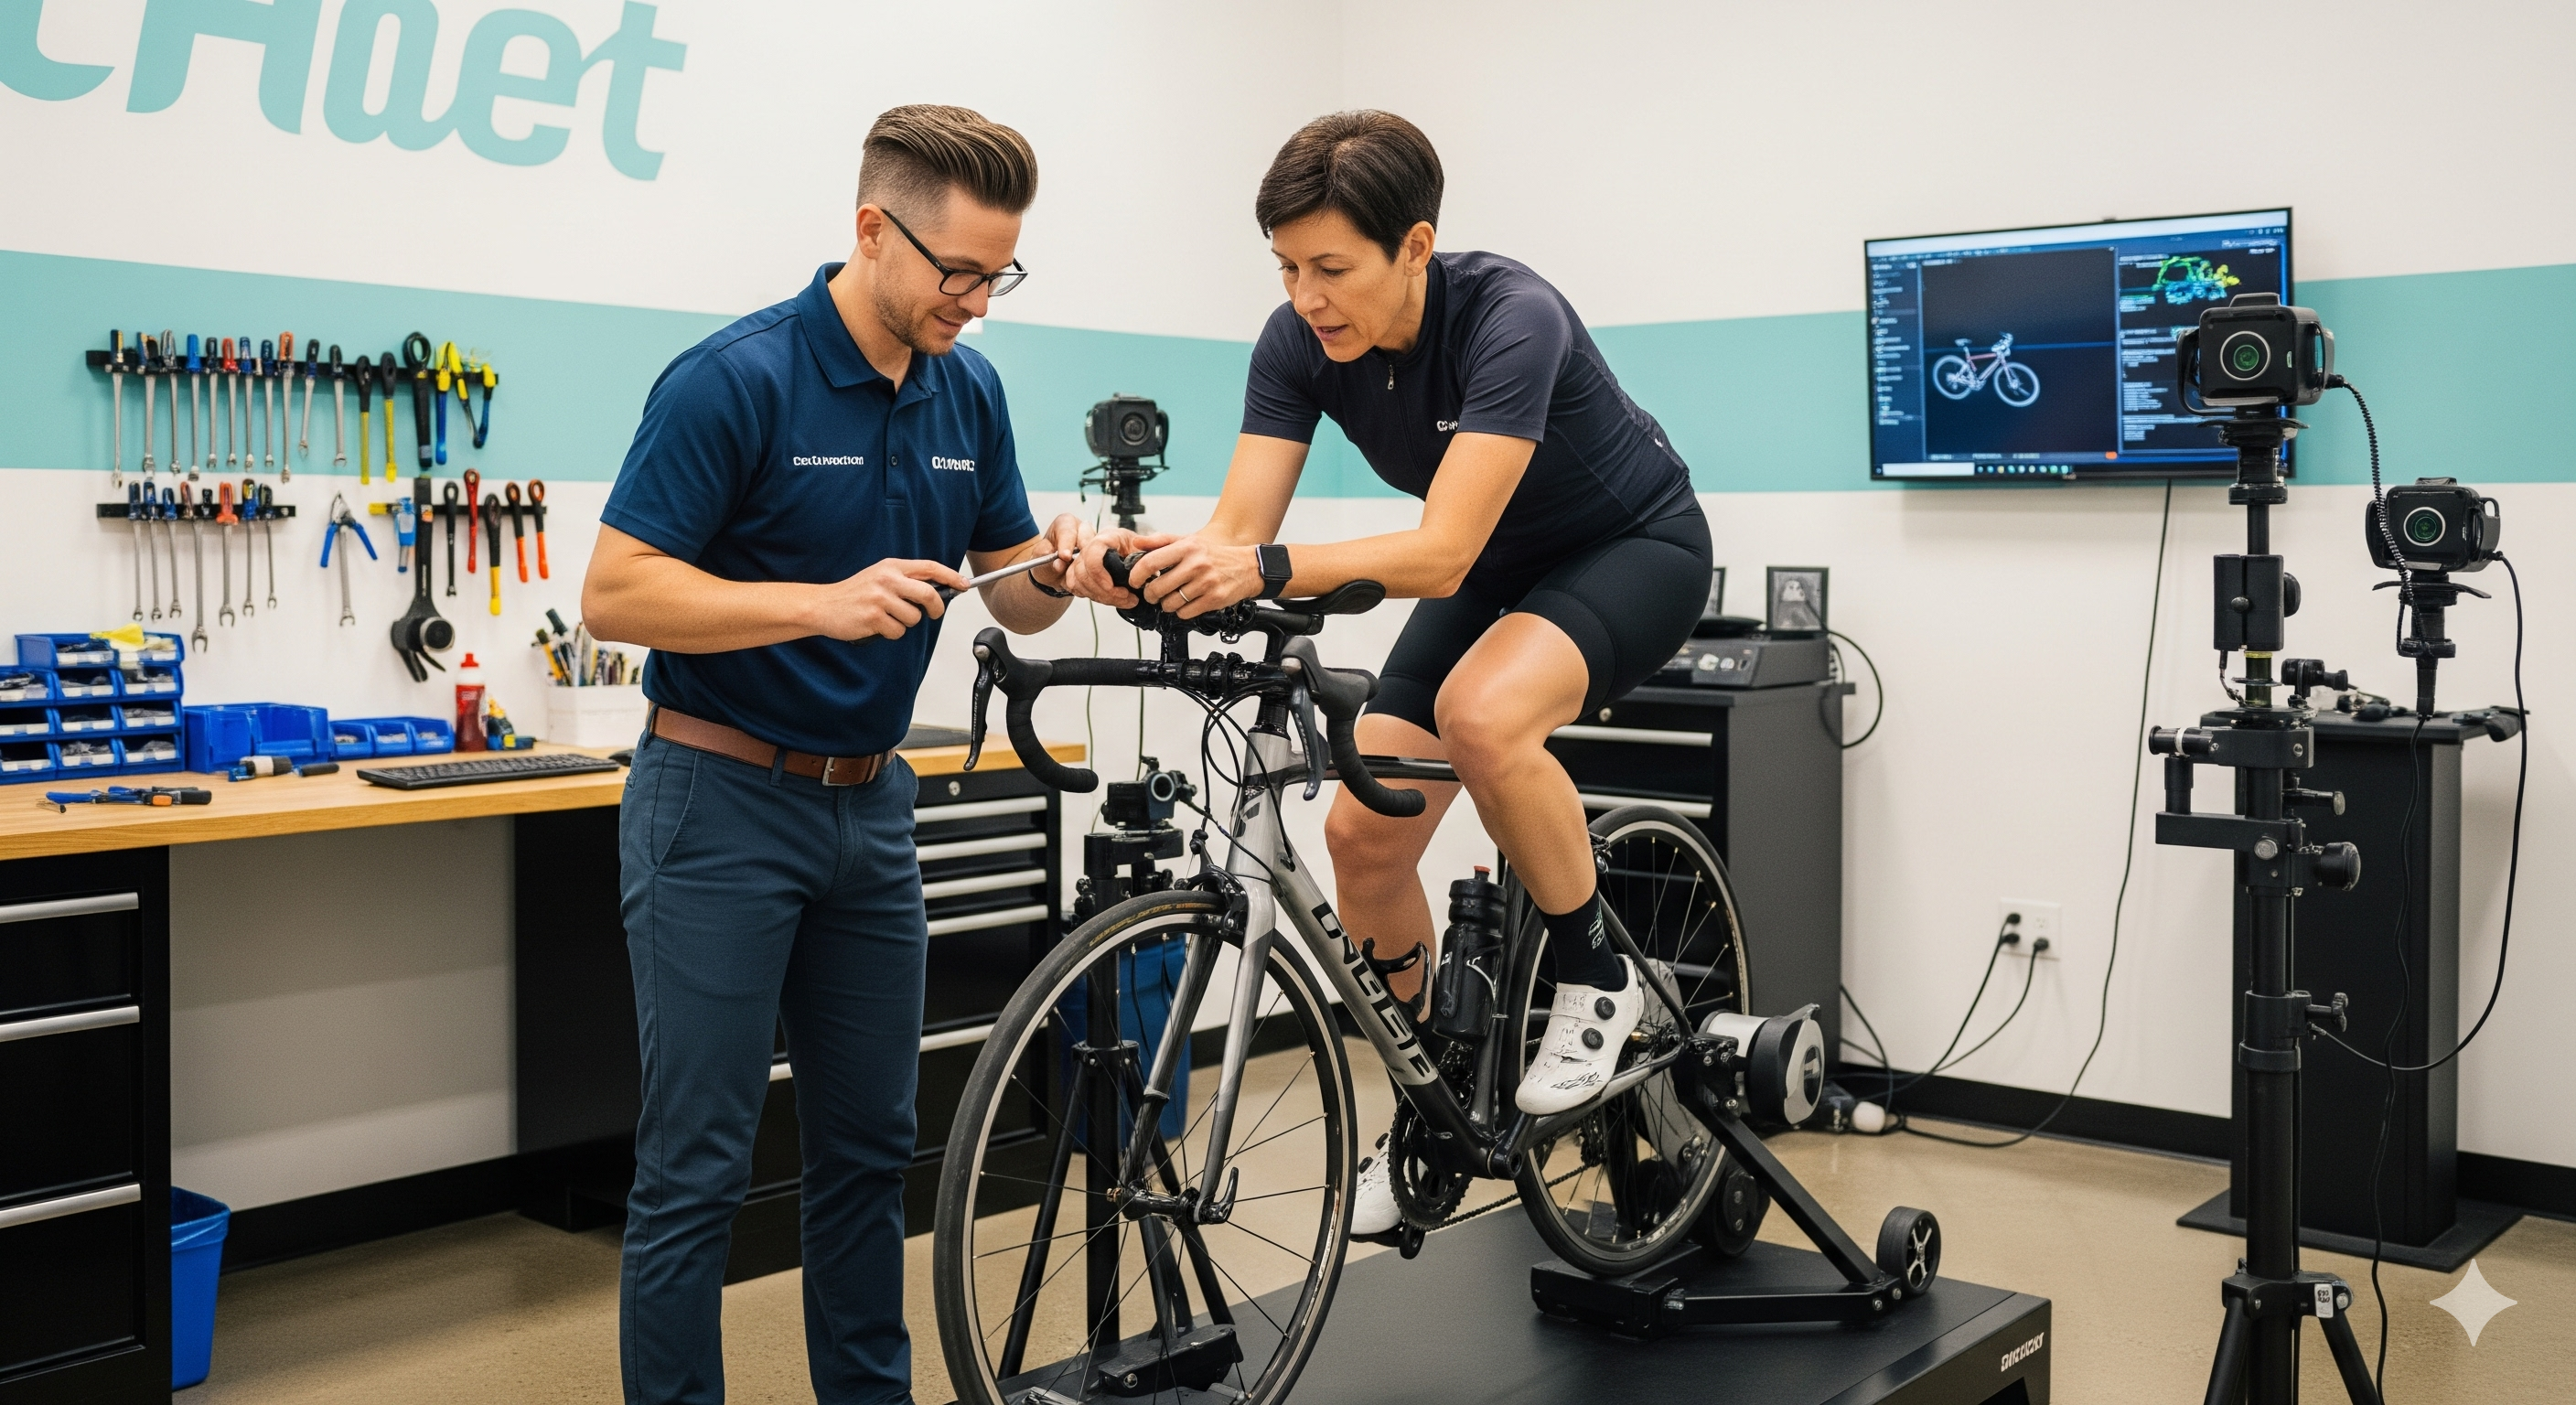
Tools and Equipment for Bike Fitting
Having the right tools makes bike fitting easier and more accurate:
Essential Tools
- Tape measure or ruler
- Plumb line or laser level
- Allen keys (hex wrenches)
- Torque wrench
- Bike trainer or stationary setup
- Camera or smartphone for position analysis
Professional Fitting Tools
- Fit bike or adjustable trainer
- Motion capture systems
- Pressure mapping for saddle fit
- Power meters for efficiency analysis
- 3D body scanning technology
When to Seek Professional Help
While basic adjustments can be done at home, consider professional fitting for:
Professional Fitting Recommended
- • Persistent pain or discomfort
- • New bike purchase
- • Significant changes in flexibility or fitness
- • Competitive cycling goals
- • Complex fit issues
- • Multiple bikes that need coordination
Maintaining Your Fit
Bike fit isn't a one-time adjustment. Consider these factors:
Regular Reassessment
- Check fit after significant mileage increases
- Reassess if you experience new discomfort
- Adjust for changes in flexibility or fitness
- Consider seasonal adjustments for different riding styles
Fit Evolution
Your optimal fit may change as you become more experienced, flexible, and stronger. Don't be afraid to make gradual adjustments as you develop as a cyclist.
Conclusion
Achieving the perfect bike fit is a process that requires patience, attention to detail, and sometimes professional guidance. Start with the basics covered in this guide, make small adjustments, and listen to your body. Remember that comfort and efficiency should be your primary goals.
A well-fitted bike will enhance every aspect of your cycling experience, from daily commutes to long recreational rides to competitive events. Invest the time to get your fit right, and you'll enjoy cycling more while reducing the risk of injury and discomfort.
Need Professional Bike Fitting?
Our certified fit specialists can help you achieve the perfect riding position.
Book Fitting Session